Photography lighting basics begin with a simple principle: the camera records light before it records colour, texture or detail. A technically expensive camera cannot rescue an image that is poorly lit, while a modest camera can produce striking results when the photographer understands where the light is coming from and how it interacts with the subject.
Three factors matter most: quality, direction and source. Soft light produces gradual transitions between highlights and shadows, making it useful for portraits, food photography and scenes where a calm, natural appearance is required. Hard light creates sharper shadows and stronger contrast. It can reveal texture, define architectural shapes and create a more dramatic visual style.
Direction is equally important. Front lighting can reduce shadows and make a subject appear clear and even, but it may also remove depth. Side lighting emphasises shape and texture. Backlighting can separate a subject from its background and create silhouettes or glowing edges.
The practical lesson is that good lighting is not simply about making a scene brighter. It is about deciding what the light should communicate. A portrait may need soft illumination to create a relaxed mood, while a product photograph may benefit from controlled highlights that show material and form.
This distinction has become increasingly relevant as smartphones and mirrorless cameras automate exposure. Modern technology can calculate brightness quickly, but it cannot decide whether the direction of light supports the story of an image. That remains a creative decision.
Understanding the Main Types of Light
Natural light remains one of the most accessible tools available to photographers. Window light, overcast daylight and late-afternoon sunlight can all create very different results without additional equipment.
Artificial lighting offers greater consistency. LEDs, flash units and studio strobes allow photographers to control intensity, colour temperature and direction. The trade-off is complexity. More equipment creates more opportunities for unwanted reflections, mixed colour temperatures and difficult shadows.
| Light Type | Typical Effect | Best Use |
| Soft light | Gentle shadows, smooth transitions | Portraits, lifestyle images |
| Hard light | Strong contrast and defined shadows | Fashion, architecture, dramatic scenes |
| Front light | Even exposure, reduced texture | Documentation and simple product work |
| Side light | Depth and texture | Portraits, still life and interiors |
| Backlight | Separation, glow or silhouette | Creative portraits and outdoor scenes |
A useful original insight for beginners is that softness is largely determined by the apparent size of the light source relative to the subject. A small distant lamp behaves differently from a large window close to a person. Moving the same source closer can therefore change the quality of light without buying new equipment.
Why the 45-Degree Setup Works
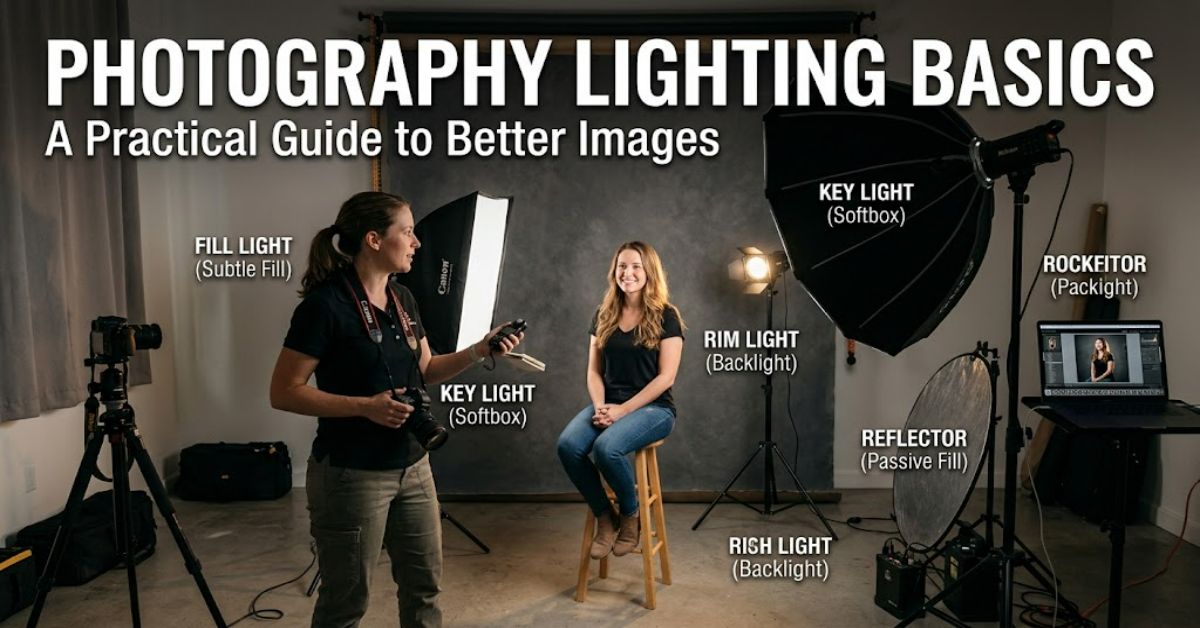
A common starting point is to position a key light approximately 45 degrees to one side of the subject and slightly above eye level. This arrangement creates visible modelling across the face or object while retaining enough illumination to show detail.
It should not be treated as a universal rule. A symmetrical product may require more even illumination, while a dramatic portrait may intentionally place much of the face in shadow. The value of the 45-degree setup is that it gives beginners a repeatable baseline from which to experiment.
A second practical insight is that light placement and camera placement must be considered together. Moving the light while leaving the camera fixed may improve the subject but create distracting shadows in the background. Effective lighting is therefore a relationship between subject, source, camera and environment.
Natural Versus Artificial Light
Natural light changes constantly. Cloud cover, time of day and reflections from nearby surfaces can alter an image within minutes. This unpredictability can be frustrating, but it also encourages observation.
Artificial light is more repeatable. A controlled LED or flash setup can be recreated for multiple products or portraits. This is particularly important in commercial photography, where consistency may matter as much as creativity.
| Consideration | Natural Light | Artificial Light |
| Cost | Usually free | Equipment investment required |
| Consistency | Changes with weather and time | Highly controllable |
| Portability | No equipment needed | Depends on setup |
| Colour control | Can vary significantly | Adjustable on many modern systems |
| Creative flexibility | Dependent on location | Greater repeatability |
The hidden limitation of artificial lighting is that control can become excessive. Beginners sometimes add several lights before understanding what one light is doing. Starting with a single source makes shadows easier to read and exposes problems more quickly.
Shaping Light With Simple Modifiers
Photography lighting basics also include learning how to modify a source. Diffusers soften light by spreading it across a larger apparent area. Reflectors redirect existing light into darker areas. Flags and black surfaces can reduce reflections or deepen shadows.
The simplest workflow is often to make one adjustment at a time:
- Position the main light.
- Examine the shadow pattern.
- Adjust the distance or angle.
- Add a reflector only if important detail is lost.
- Introduce further lights only when the image requires them.
This approach reduces a common failure mode: correcting one lighting problem by creating three new ones.
Real-World Impact of Better Lighting
Professional visual communication increasingly depends on images that remain clear across websites, social platforms and high-resolution displays. Lighting affects perceived quality because viewers respond quickly to contrast, separation and visual hierarchy.
Documented photographic practice also demonstrates that lighting choices shape interpretation. Portrait photographers often use broad, soft sources to control skin texture, while editorial and architectural photographers may use directional light to reveal structure and atmosphere. The technical decision becomes part of the visual message.
For beginners, the most useful investment may not be another camera body. Improving observation skills and learning to control one source can produce more visible gains than upgrading equipment.
The Future of Photography Lighting Basics in 2027
By 2027, computational photography and AI-assisted editing are likely to make exposure correction and local adjustments easier. However, these tools will not remove the need for deliberate lighting at the moment of capture.
The likely change is a more integrated workflow. Photographers will increasingly combine practical lighting with software-based refinement, particularly in commercial production. Portable LED technology is also becoming more capable, making controlled lighting easier outside traditional studios.
The uncertainty lies in authenticity. As synthetic and heavily edited images become more common, natural lighting decisions may become an important part of establishing trust in documentary and editorial photography. The technical tools will improve, but visual judgement will remain the differentiating skill.
Key Takeaways
- Soft and hard light create fundamentally different emotional and visual effects.
- Direction matters as much as brightness.
- A 45-degree key light is a useful starting point, not a fixed rule.
- Moving a light closer can change its apparent softness.
- Natural light offers character; artificial light offers repeatability.
- One carefully controlled source can outperform a complicated setup.
- Good lighting begins with observation rather than equipment.
Conclusion
Photography lighting is best understood as a system of choices rather than a collection of equipment. The photographer decides how much contrast to retain, which details to reveal and where shadows should fall. Soft light can create a calm, flattering result, while hard light can introduce energy and graphic structure. Direction then determines how those qualities describe the subject.
For beginners, the most reliable path is to work slowly with one source and study the result. Move the light, change its distance, alter the angle and observe what happens to the shadows. Once those relationships become familiar, reflectors, diffusers and additional lights become tools for solving specific creative problems rather than accessories added without purpose.
Mastering light takes practice, but the underlying principles remain approachable. Understanding quality, direction and source provides a strong foundation for portraits, products, landscapes and almost every other photographic genre.
FAQ
What are the most important photography lighting basics?
The most important principles are light quality, direction, intensity and colour. Start by learning how a single source affects shadows and highlights before building more complex setups.
Is natural light better than artificial light?
Neither is automatically better. Natural light can look organic and atmospheric, while artificial lighting provides greater consistency and control. The best choice depends on the subject and intended result.
What is soft lighting in photography?
Soft lighting produces gradual transitions between highlights and shadows. It is commonly created using a large source relative to the subject, such as a window, softbox or diffused light.
Why is side lighting useful?
Side lighting creates shadows across a subject, which can add depth, texture and dimensionality. It is particularly useful when photographing faces, objects with surface detail and architectural forms.
Do beginners need expensive lighting equipment?
No. A window, simple reflector and affordable continuous light can teach the core principles. Understanding placement usually matters more than owning a large amount of equipment.
What is the best lighting angle for portraits?
A light placed around 45 degrees from the subject is a useful starting point because it creates shape without producing extreme shadows. The ideal angle varies according to facial structure and creative intent.
Methodology
This article photography lighting basics was developed using established photographic principles relating to light direction, apparent source size, shadow behaviour and colour control. The analysis focuses on practical techniques that can be tested with natural light or standard photographic equipment.
The main limitation is that lighting remains dependent on subject, environment, camera settings and creative intent. There is no single arrangement that produces the best result in every situation. Recommendations are therefore presented as starting points rather than fixed rules.
This article was drafted with AI assistance and should be reviewed and verified by the human editor before publication. Technical claims, references and citations should be independently confirmed by the editorial team at RubbleMagazine.co.uk.
References
Adobe. (2024). Photography lighting techniques and principles. Adobe Creative Resources.
Cambridge in Colour. (2024). Understanding camera exposure and light in photography. Cambridge in Colour.
Royal Photographic Society. (2024). Photography education and technical guidance. Royal Photographic Society.